Hello sunshine!
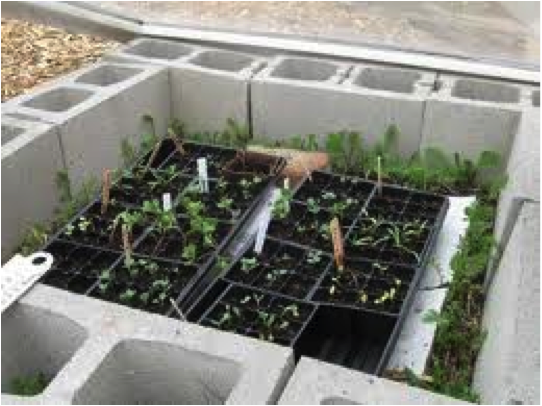
Take full advantage of the start of daylight savings time this month (beginning March 10) and build a simple cold frame to get a head start on your summer vegetable garden. I like constructing a quick, easy, efficient, fun, and recyclable unit. No high-priced fancy wood or plastic composite structures from a catalog for me. Just follow these six easy steps.
Step 1
Locate a level, sunny spot in your yard. You can make your cold frame any size, but I recommend starting with a space that’s 24” x 36” to 30” x 60”.
Step 2
Lay down a 1” layer of mulch – straw, dry leaves, wood fines, or finished compost, and cover it with a permeable weed fabric. Measure the weed fabric so that it extends beyond the outline of your cold frame by 24” on all sides.
 Step 3
With the mulch base and weed fabric in place, begin building the sides of your cold frame to a height 12”-16”. To build the sides use recycled concrete blocks, bricks, straw bales, or stack up bags of WM EarthCare™ compost and mulch that you can use later in the year. Building your cold frame with bags of compost has the added advantage of helping to warm your structure by trapping the heat given off by microbes in the bags.
 Step 4
Set the first row of side materials in place and fold the extra weed fabric back over the first row, then place the second row of side material above, taking care to overlap edges and seams. Take care that each row of side materials is level (or close to it) before adding the next. You may find it helpful to have an extra pair of hands to assist you.
Step 5
Continue building the sides until reaching the desired height of 12”-16”. Be sure that top row of side materials is nearly level.
Step 6
Cover the cold frame by using recycled window sashes, window glass, plexiglass, polycarbonate, polyethylene sheeting, or anything else that sunlight will easily penetrate. If you use poly sheeting, cut the sheet to extend completely to the edges of the side material, and use additional side material to hold the sheeting tightly in place. Vent the cold frame by propping open edges as needed. To control the temperature more precisely, place a compost or soil thermometer in one of the starter pots housed in the cold frame.
In just 6 steps and a few hours time, you’ll have a fully functional cold frame to jumpstart and harden-off your veggies.
Now start using your cold frame by seeding clean flats and pots containing a high-quality potting mix with your favorite veggies. Select veggies that transplant well, and require extra protection from late frost like tomatoes and peppers. In just a matter of weeks you’ll have transplant ready veggies for planting in your garden.
After all of your starter plants have been transplanted, you can disassemble the cold frame and use the space for planting. If you constructed the sides of the cold frame with baled straw or bagged compost you can now use that as mulch to retain moisture and prevent weeds around transplants.
That’s closing the loop, cold frame style.
Time to dig in!
~Dirt Dude


